Transforming a venue isn’t about the decor you add, but the light you use to sculpt the existing space and guide your guests’ emotions.
- Lighting is a technical tool: success depends on understanding power requirements (wattage), color accuracy (CRI), and installation logistics (rigging).
- A strategic lighting plan creates an « emotional narrative, » subtly shifting the energy from intimate dinner to high-energy dance party.
Recommendation: Instead of focusing on concealing a venue’s flaws, learn to use light and shadow to redefine its architecture and create a completely new atmosphere.
You’ve toured countless wedding venues. Some are breathtakingly beautiful but have an equally breathtaking price tag. Others, the ones that fit the budget, feel… dull. A blank canvas is one thing; a boring, beige box with bad wallpaper is another. The common advice is to cover it all up with expensive flowers and draping. But what if the most powerful tool for transformation isn’t what you hang on the walls, but how you illuminate them?
Most couples think of lighting in simple terms: string lights for romance, uplighting for a splash of color. While not wrong, this view barely scratches the surface. For a professional lighting designer, light is not mere decoration. It is a medium for sculpting space, directing focus, and crafting an emotional journey for every guest in the room. It’s the difference between simply making a room brighter and fundamentally changing its perceived architecture and atmosphere.
This guide abandons the platitudes. We will not be talking about which color is « in » this season. Instead, we will delve into the technical and artistic secrets that professionals use to wield light as a transformative force. We will explore how to manage power, the physics of creating depth, the science behind flattering skin tones, and the art of scripting an entire evening’s energy with a dimmer switch. You will learn to see lighting not as an expense, but as the single most effective investment for maximizing visual impact on a limited budget.
This article provides a blueprint for thinking like a lighting designer. From the critical logistics of power and setup to the nuanced strategies for hiding flaws and guiding emotions, you’ll gain the technical knowledge needed to turn any space from dull to dazzling.
Summary: How to Transform a Venue With Lighting
- Why You Need a Dedicated Generator for Your Lighting Rig?
- Bistro String Lights vs. Uplighting: Which Creates More Depth?
- The Setup Time Trap: Why Lighting Crews Need 4 Hours Minimum?
- The Colored Light Mistake That Turns Guest Faces Purple in Photos
- How to Dim Lights Strategically to Shift Energy from Dinner to Dancing?
- How to Light High Barn Ceilings Without a Cherry Picker?
- Draping vs. Lighting: Which Hides Bad Wallpaper More Effectively?
- Pole Tent vs. Frame Tent: Which Structure Suits Your Land Best?
Why You Need a Dedicated Generator for Your Lighting Rig?
The most elegant lighting design is useless if it plunges the venue into darkness. The number one mistake couples make is underestimating the sheer electrical load of a professional lighting setup. Venue outlets are almost never sufficient, especially in older buildings, barns, or outdoor tents. They are typically on shared circuits with the catering kitchen or the DJ, creating a high risk of tripping a breaker at the worst possible moment. A dedicated power source isn’t a luxury; it’s a non-negotiable component of a reliable event.
The power draw adds up faster than you’d think. A modest lighting package can easily exceed the capacity of a standard wall circuit. According to a power consumption analysis, tented weddings require anywhere from 6,200 watts for small weddings to over 17,600 watts for larger events with extensive lighting and sound. Attempting to run this off venue power is a recipe for disaster. A dedicated generator ensures your lighting runs on a clean, isolated circuit, free from interference and overload risks.
Choosing the right generator is a technical decision. You need a specific type to protect your expensive lighting and sound equipment. Here are the key specifications:
- Generator Type: Insist on a multi-circuit inverter generator. These provide stable, « clean » power essential for sensitive electronics like LEDs and computers. Standard non-inverter generators can cause power fluctuations that damage equipment and run for only 3-4 hours. An inverter model will provide a minimum of 8-10 hours of runtime.
- Wattage Calculation: Sum the total wattage of all fixtures. As a rule of thumb, incandescent lights use about 5 amps each, while modern LED uplights might only use 2 amps. A dynamic dance floor lighting package can add another 10-20 amps.
- Capacity Planning: Always plan for at least double the calculated wattage. Running a generator at its maximum load causes voltage drops and can damage both the generator and the lighting fixtures it’s powering.
- Placement and Safety: The generator must be positioned far from guests to mitigate noise, ideally behind a building or using sound-baffling. Crucially, ensure it has proper ventilation to prevent the accumulation of deadly carbon monoxide gas near any occupied space.
Ultimately, a dedicated generator is the foundational insurance policy for your wedding’s atmosphere. It’s the unseen hero that allows the entire visual and auditory experience to unfold without a hitch.
Bistro String Lights vs. Uplighting: Which Creates More Depth?
When sculpting a space with light, the goal is to manipulate perception. Two of the most common tools, bistro lights and uplighting, achieve this in fundamentally different ways. They don’t just add light; they add dimension. The choice between them—or the combination of them—depends on whether you want to create horizontal or vertical depth.
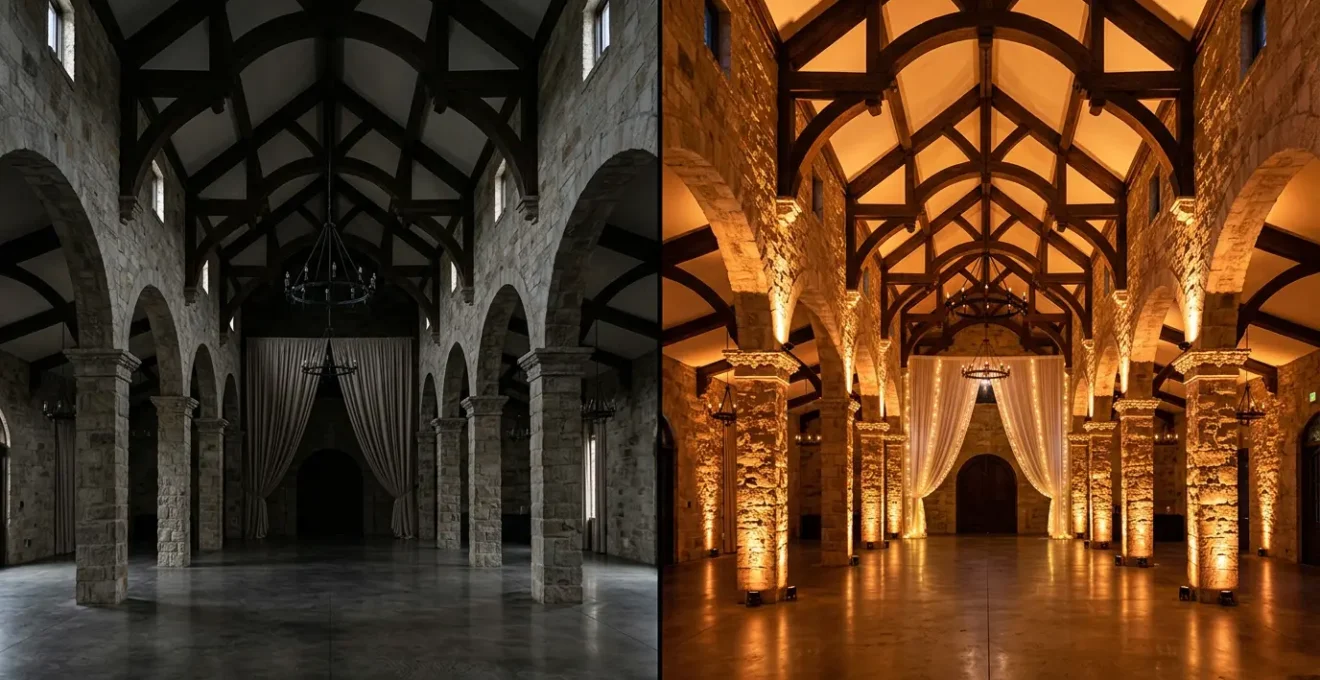
Uplighting creates vertical depth. By placing fixtures on the floor and aiming them up a wall or column, you draw the guest’s eye upward. This technique emphasizes soaring ceilings, highlights architectural details, and makes a room feel taller and grander. It visually « pushes » the walls out, creating a sense of volume and space. Bistro string lights, conversely, create horizontal depth and intimacy. By stringing them overhead, you create a perceived « ceiling » of light, which can make a large, cavernous space feel more intimate and cozy. The repeating pattern of bulbs guides the eye horizontally across the space, establishing a human-scale plane within a larger volume.
This image illustrates the power of combining both techniques for maximum spatial impact.
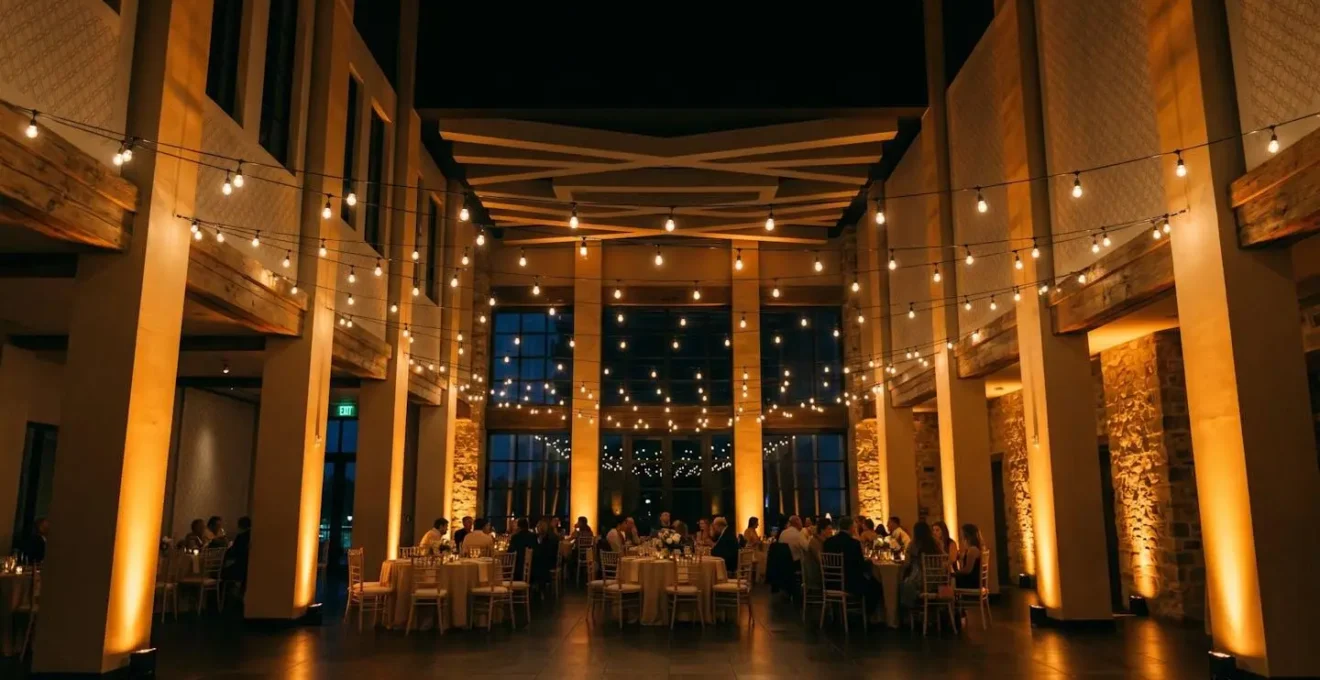
Notice how the amber uplights on the walls establish the room’s grand scale and height, while the warm canopy of bistro lights defines the intimate dining area below. The interplay creates layers of light, adding a rich, three-dimensional quality that neither technique could achieve alone. As the experts at Brilliant Event Lighting note:
Uplighting draws the eye vertically, accentuating height and creating architectural depth, while bistro lights create a perceived ‘ceiling,’ fostering intimacy and horizontal depth.
– Wedding Lighting Design Analysis, Brilliant Event Lighting – Uplighting for Weddings Guide
The most effective designs often use both. Use uplighting to define the architectural shell of the room and bistro lights to define the human-centric spaces within it. This creates a dynamic, layered environment that feels both grand and personal.
The Setup Time Trap: Why Lighting Crews Need 4 Hours Minimum?
One of the most common points of friction between couples and vendors is venue access time. A venue might only offer a two-hour setup window, but your lighting designer insists they need four. This isn’t a power play; it’s a logistical necessity born from the hidden complexities of a professional and safe installation. Believing a complex lighting rig can be thrown up in an hour is the « setup time trap. »
Professional lighting companies report that even a basic setup takes time, with most weddings requiring a 4-hour setup window. This time isn’t spent just plugging in lights. It’s dedicated to tasks you don’t see: safely running and taping down miles of cabling, building truss structures, carefully aiming dozens of fixtures to create the perfect wash, and troubleshooting the inevitable issues that arise. Rushing this process leads to sloppy aesthetics and, more importantly, significant safety hazards like tripping risks or overloaded circuits.
The complexity of the design directly dictates the timeline, especially in challenging environments like tents. What seems like a simple task of hanging string lights can involve a surprising amount of labor and technical expertise.
Case Study: Complex Wedding Tent String Lighting Installation
A professional lighting company, documenting their process for a tented wedding, found that a standard installation required an average of 6 man-hours. For more complex designs, like a dense canopy of twinkle lights, the work soared to 15+ man-hours. This extended timeline accounted for the meticulous, ladder-based work of installing over 600 individual bulbs, ensuring all outdoor connections were properly weatherproofed, and complying with local electrical permitting, which, as noted in a report by Rob Alberti, often requires licensed electricians for legal and safe installation.
When booking your venue, always advocate for the maximum possible setup time for your vendors. That four-hour window isn’t buffer time; it’s the required time to transform your space safely and beautifully.
The Colored Light Mistake That Turns Guest Faces Purple in Photos
Colored uplighting can seem like a budget-friendly way to inject personality into a bland room. Want a romantic feel? Bathe the walls in amber. A vibrant party? Go for magenta. But there’s a hidden photographic trap: using saturated, low-quality colored light is the fastest way to ruin your wedding photos. When cheap LED fixtures drench a room in deep blue or purple, that color doesn’t just stay on the walls. It reflects onto everything, including your guests’ skin, giving them a sickly, unnatural hue in every picture.
The culprit is a low Color Rendering Index (CRI). CRI is a scale from 0 to 100 that measures a light source’s ability to reveal the true colors of an object compared to natural sunlight. A cheap, saturated blue LED might have a very low CRI, meaning it can’t render other colors (like skin tones) accurately. Your expensive photographer will then have to spend hours in post-production trying (and often failing) to correct skin tones that look bruised or alien-like. The solution isn’t to avoid color, but to use high-quality light and a professional’s understanding of color theory.
This is why professional lighting designers are obsessed with the quality of their fixtures, not just the color they produce.
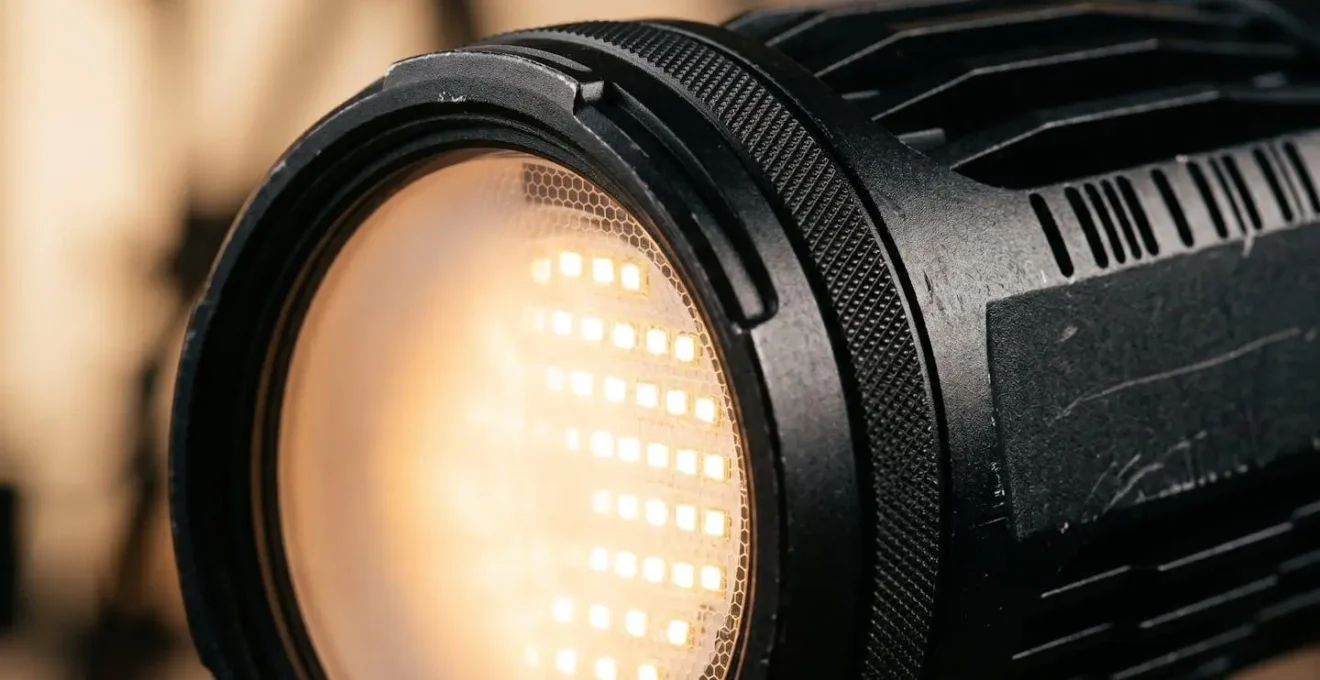
A professional fixture can produce a wide spectrum of colors while maintaining a high CRI. This is because it mixes light from multiple color diodes (Red, Green, Blue, Amber, White, and sometimes Lime) to create the final hue. This allows a designer to create a beautiful amber or soft blush that still contains enough of the light spectrum to render skin tones beautifully and naturally. For critical applications, lighting experts recommend a CRI of 90 or above to ensure what you see with your eyes is what the camera captures. This is the technical secret to having vibrant color in your room *and* beautiful, healthy-looking people in your photos.
So, when discussing color with your lighting provider, ask them about the CRI of their fixtures. It’s a technical question that immediately signals you understand the difference between simply coloring a room and professionally illuminating an event.
How to Dim Lights Strategically to Shift Energy from Dinner to Dancing?
The most powerful tool in a lighting designer’s arsenal isn’t a specific fixture; it’s the dimmer. The ability to control the intensity of light is the ability to control the energy of the entire room. A wedding reception is not a single event; it’s a performance in several acts—ceremony, dinner, toasts, dancing—and each act requires its own unique atmosphere. A static, unchanging lighting scheme is a missed opportunity. The true art lies in creating a dynamic lighting narrative that evolves with the evening, guiding your guests’ emotions and energy levels from start to finish.
Think of your lighting designer as a conductor. They use light to tell people when it’s time to be reverent, when it’s time for intimate conversation, and when it’s time to explode onto the dance floor. This isn’t random; it’s a carefully scripted sequence. The transition from the bright, even light of dinner to the dark, energetic vibe of the dance party is the most crucial moment. A slow, almost imperceptible fade can subtly signal the shift, while a dramatic « snap » to a new look synchronized with the first dance song can create a powerful « wow » moment.
A professional lighting narrative can be broken down into a strategic framework:
- Act 1: Ceremony & Dinner. The focus here is on soft, even, warm lighting. The goal is a reverent and intimate atmosphere where guests can easily see each other and converse. Any decorative lighting should be a gentle, romantic glow.
- Act 2: Toasts & Speeches. As the focus shifts to a speaker, the lighting should follow. A « pin-spot » light is used to illuminate the speaker at the lectern or table, making them the clear center of attention while the ambient glow over the dining areas is maintained.
- Act 3: The Transition. This is the key moment. The designer can execute a slow, five-minute fade during the last dinner course to subconsciously signal the energy is about to shift. Alternatively, for a high-impact transformation, they can use a dramatic « snap » to a completely different lighting look, perfectly timed to the first beat of the first dance song.
- Act 4: Full Dance Party. Now, the rules change. The lights over the dining areas drop to near-dark, focusing all visual energy on the dance floor. This is where dynamic, colored, and moving lights are brought up to create a concert-like energy and excitement, encouraging everyone to join the party.
You can control your entire reception’s energy with lighting intensity alone. We literally conduct your entire wedding’s emotional journey through light. It’s like having a secret remote control for your guests’ energy levels.
– Second Song Events (6,000+ venue transformations), Wedding Lighting Setup Guide: Transform Your Venue in 2025
This deliberate control of light intensity is what separates a simple party from an unforgettable, professionally produced experience. It’s a silent, powerful force that shapes the entire evening.
How to Light High Barn Ceilings Without a Cherry Picker?
Rustic barns are incredibly popular wedding venues, but their greatest asset—soaring, high ceilings with beautiful wooden beams—is also their greatest lighting challenge. How do you hang bistro lights or aim fixtures 30 feet in the air without access to a scissor lift or cherry picker, which are often impractical or forbidden in historic structures? The answer lies in clever, ground-based, and non-damaging rigging techniques that work with the venue’s architecture instead of fighting against it.
The key is to avoid relying on ceiling attachment points as your only option. Professional designers have a toolkit of freestanding and adaptive solutions to bring light to any height. This involves using vertical structures to create your own rigging points or leveraging existing architectural features in safe and approved ways. Before implementing any of these, it is absolutely critical to consult with the venue owner about what is and is not allowed. Attaching anything to a historic structure without permission can lead to damage and significant liability.
When a lift is not an option, these professional workarounds can create stunning effects while respecting the integrity of the venue.
Action Plan: Rigging High Ceilings Without a Lift
- Deploy Vertical Truss « Totems »: Use freestanding vertical truss towers, often hidden by fabric or placed discreetly in corners. These totems can hold multiple lighting fixtures at any desired height, allowing you to create washes, aim spotlights, or establish high rigging points without ever touching the ceiling.
- Utilize Magnetic Hooks: For barns or venues with exposed metal beams or roofing, high-strength neodymium magnetic hooks are a game-changer. They serve as powerful, temporary, and completely non-damaging rigging points for lightweight items like string lights or fabric swags.
- Implement Cross-Beam Stringing: Work with the existing architecture by zig-zagging string lights between the exposed wooden rafters. This « cross-beam » technique doesn’t require reaching the high central peak but can create an intricate, beautiful canopy effect by weaving a web of light within the beam structure itself.
- Prioritize a Safety Protocol: This is the most important step. Always consult the venue owner about the load-bearing capacities of any beams and which points, if any, are approved for rigging. A professional will always prioritize safety and venue preservation over a specific design element.
By thinking creatively about rigging, you can overcome the physical limitations of a venue and achieve a design that feels fully integrated and breathtakingly beautiful, all while keeping your feet firmly (and safely) on the ground.
Key Takeaways
- Lighting is a technical craft: Success depends on mastering power (wattage), color science (CRI), and logistics (setup time), not just picking pretty fixtures.
- Create an « emotional narrative »: A great lighting design is dynamic, strategically shifting the atmosphere to guide guest energy from intimate dinner to high-energy dance party.
- Light is a problem-solver: Use it to sculpt space, create depth, hide architectural flaws, and transform the perceived dimensions of your venue.
Draping vs. Lighting: Which Hides Bad Wallpaper More Effectively?
You’ve found a venue that’s perfect in every way—except for the distractingly bold, dated, or just plain bad wallpaper. The two primary tools for solving this problem are fabric draping and a lighting wash. Both can be effective, but they work in very different ways and come with different cost structures. Choosing the right tool for the job depends on the specific nature of the wallpaper and your overall budget.
Fabric draping offers a 100% physical coverage solution. It literally hides the wall behind a new, clean surface. This is the most effective method for dealing with high-contrast, dark, or heavily textured patterns that would be difficult to mask with light alone. However, it is labor-intensive and typically priced per linear foot, which can add up quickly over large areas.
A lighting wash, on the other hand, is a solution of visual distraction. By bathing the wall in a new, uniform color of light, you can dramatically change its appearance and make the underlying pattern much less noticeable. This is highly effective on plain or low-contrast wallpapers. A single, well-placed lighting fixture can cover a large section of wall, making it a very cost-effective approach. Its limitation is on heavily textured or dark-patterned walls, where the original pattern might still be visible as shadows or dark shapes through the light. The most transformative results often come from combining both methods.
This table breaks down the cost-effectiveness and best-use cases for each approach, based on an analysis from event design professionals.
| Method | Coverage Effectiveness | Cost Structure | Best Use Case | Limitation |
|---|---|---|---|---|
| Fabric Draping | 100% physical coverage | Per-foot pricing ($8-15/ft typical) | High-contrast or bold dark wallpaper patterns | Labor-intensive installation, requires extensive setup time |
| Lighting Wash | 80% visual distraction | Area-of-effect pricing (single fixture covers large wall section) | Plain or low-contrast wallpaper in need of color transformation | Less effective on textured or high-contrast patterns where shadows remain visible |
| Combined Approach | Complete transformation potential | Higher initial cost, maximum impact | Creating entirely new custom environment with blank canvas plus color washes or gobo projections | Requires coordination between draping vendor and lighting designer |
For budget-conscious couples, a lighting wash is often the highest-impact-per-dollar solution. It may not offer the complete obliteration of draping, but it can transform the color and mood of an entire room for the cost of just a few fixtures.
Pole Tent vs. Frame Tent: Which Structure Dictates Your Lighting Design?
For an outdoor wedding, the choice of tent is one of the biggest initial decisions. While factors like ground surface and desired aesthetic are important, from a lighting designer’s perspective, this choice is fundamental because it defines your « canvas » and your rigging possibilities. A pole tent and a frame tent are not just different structures; they are entirely different environments that demand unique lighting strategies. Understanding their intrinsic advantages and challenges is key to creating a stunning design.
A frame tent is a lighting designer’s dream for flexibility. Its internal grid-like skeleton of aluminum pipes provides near-limitless rigging points. Trusses, fixtures, and draping can be attached almost anywhere, allowing for maximum creative control. The segmented ceiling panels also create a perfect, flat surface for projecting crisp gobo patterns, like a monogram, without distortion. Its primary challenge is the segmented look, which requires careful fixture placement to achieve an even, seamless wash of light.
A pole tent, with its majestic, soaring peaks and minimal interior structure, offers a different kind of opportunity. Rigging is far more limited, restricted primarily to the central poles and the perimeter. However, that vast, uninterrupted canopy of white vinyl becomes a magnificent canvas for dramatic, sweeping color washes. The interior poles, often seen as obstacles, should be treated as design features—they are perfect for wrapping with fairy lights or using as the base for dramatic uplighting that accentuates the tent’s height. The challenge here is turning those structural necessities into intentional focal points.
This table compares the two tent types purely from the perspective of a lighting designer, focusing on their potential as creative spaces.
| Tent Type | Lighting Rigging Potential | Visual Canvas Quality | Structural Advantages | Design Challenge |
|---|---|---|---|---|
| Frame Tent | Grid-like structure perfect for rigging trusses, fixtures, and draping anywhere with maximum flexibility | Segmented liner ideal for projecting crisp, clear gobo patterns (monograms) without distortion | Easily accommodates transparent sidewalls to integrate beautifully lit surrounding landscape into indoor decor | Segmented interior requires careful planning for even light distribution |
| Pole Tent | Rigging limited to perimeter and central poles only | Soaring uninterrupted canopy serves as magnificent canvas for colored light washes | Interior poles can become decorative focal points when wrapped with fairy lights or used as base for dramatic upllighting | Center poles create visual obstacles that must be transformed into design features |
Ultimately, neither tent is inherently « better » for lighting; they simply offer different creative paths. A great designer doesn’t just light the tent—they use the lighting to celebrate the tent’s unique architectural form.